Let’s play a quick game of “True or False.”
True or False: Your Facebook Ads Manager is telling you the truth about your sales.
If you answered “True,” I have some bad news. You are likely missing anywhere from 15% to 30% of your actual conversion data.
Imagine opening a restaurant, but the cashier only records 7 out of every 10 orders. At the end of the day, the register is short, and you are panicking. You know you sold more burgers, but the data just isn’t there.
This is exactly what is happening to your ads right now if you are relying solely on the old Meta Pixel.
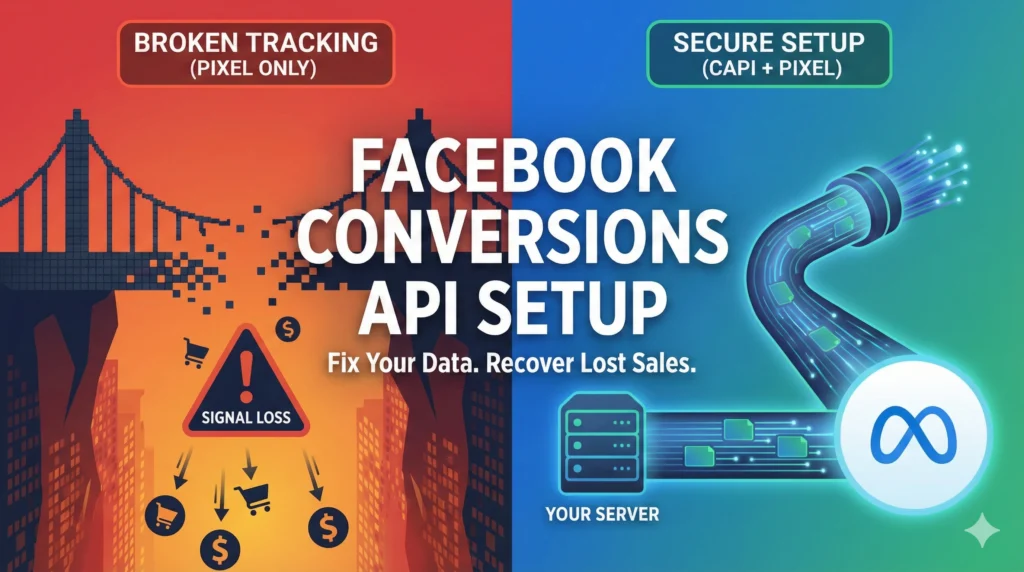
Thanks to iOS updates, ad blockers, and the death of third-party cookies, the “browser-side” tracking we used to love is full of holes. It’s leaking data. And when you lose data, you lose money because Facebook’s AI can’t optimize for sales it can’t see.
The solution? A proper Facebook Conversions API setup.
I know, “API” sounds like a complex ‘coding’ system. It sounds like something you need a computer science degree to handle. But I promise you, it’s not.
In this guide, I’m going to walk you through the entire Facebook Conversions API setup process. We will channel through technicals, use simple analogies, and get your tracking fixed so you can stop guessing and start scaling.
Table of Contents
The “Blind” Pixel: Why Your Old Tracking is Failing
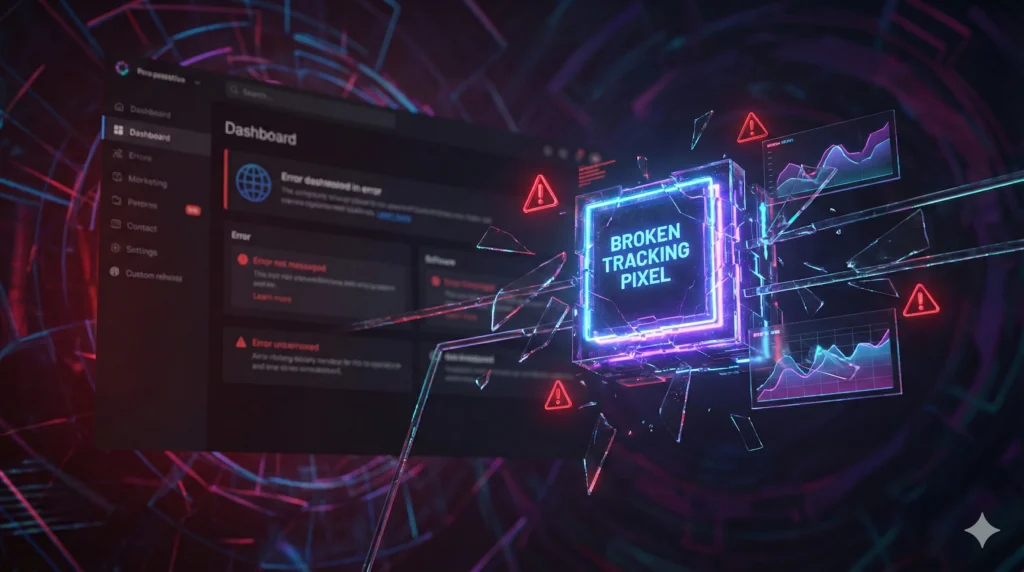
Before we dive into the actual Facebook Conversions API setup, we need to understand why we are doing this.
For years, we relied on the Meta Pixel. The Pixel is a tiny piece of code that lives on your website’s browser (like Chrome or Safari). When a customer buys something, the Pixel waves a flag and tells Facebook, “Hey! We got a sale!”
But then came the privacy revolution.
Apple released iOS14 (and now later versions), which gave users the power to say, “No, do not track me.” Browsers like Firefox and Brave started blocking trackers by default.
Suddenly, the Pixel’s flag wasn’t getting seen.
If a user on an iPhone buys your product but has asked not to be tracked, the Pixel stays silent. Facebook thinks that sale never happened.
This is a disaster for your ad performance. If Facebook doesn’t know a specific ad brought in a sale, it will stop showing that ad—even if it was your best performer!
This is why your Facebook Conversions API setup is so critical. It bypasses the browser entirely.
What Exactly is the Conversions API? (The “Direct Line” Analogy)
Think of your website tracking like delivering a message.
The Old Way (Pixel): You write a note (“consumer bought a shirt”) and give it to a pigeon (the Browser) to fly over to Facebook HQ.
- The Problem: Apple is standing outside with a giant net, catching the pigeons. The rain (Ad Blockers) washes the ink off the note. Many messages never arrive.
The New Way (Conversions API): Instead of using a pigeon, you pick up a hardwired red telephone on your desk that connects directly to Mark Zuckerberg’s desk. You speak into the phone: “consumer bought a shirt.”
- The Benefit: Apple can’t cut the phone line. The weather doesn’t matter. The message is delivered directly from your server to Facebook’s server.
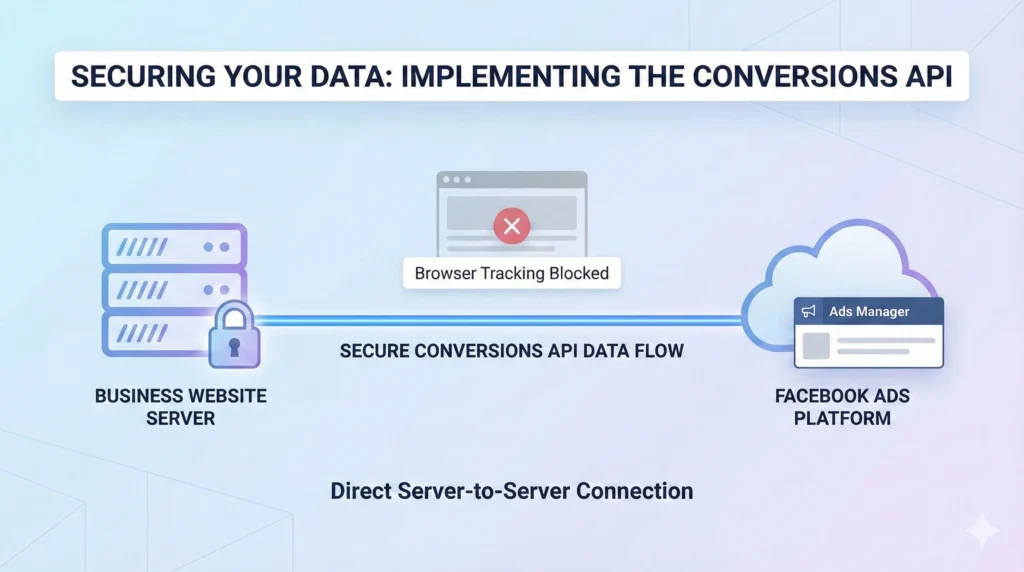
That is what a successful Facebook Conversions API setup does. It creates a direct server-to-server connection. It ensures that even if the browser blocks the Pixel, the server still sends the data.
You aren’t relying on the user’s device anymore; you are relying on your own backend data.
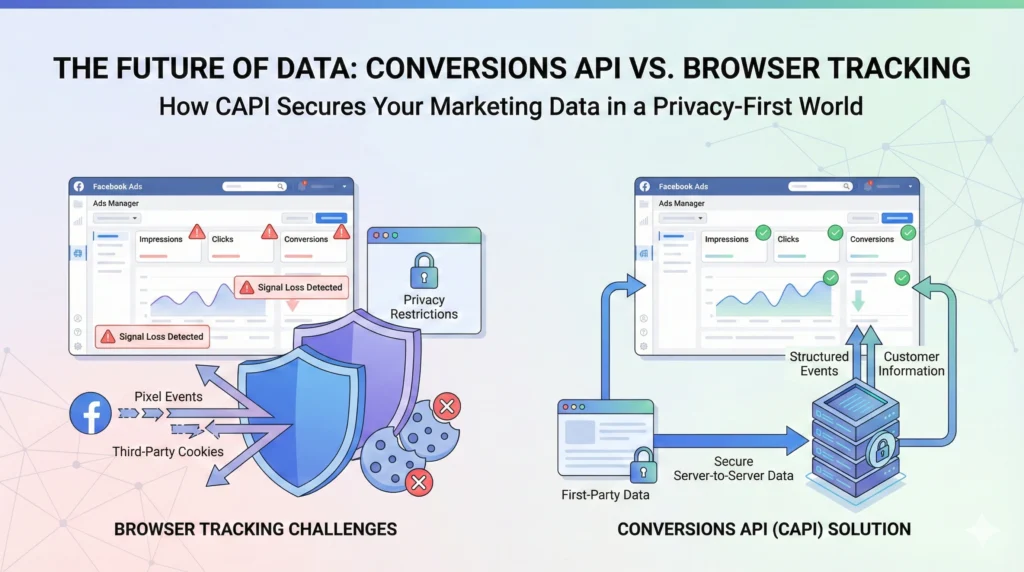
Browser vs. Server: Understanding the Difference

To master your Facebook Conversions API setup, you have to understand where the data lives.
- Browser-Side Tracking (The Pixel): Relies on “Cookies.” It happens on the user’s device. It is at risk of ad blockers, connectivity issues, and privacy settings.
- Server-Side Tracking (CAPI): Relies on your website’s database. It happens in the cloud. It is tough, private, and reliable.
“So,” I hear you ask, “should I delete my Pixel and just use the API?”
NO!
This is a huge misconception. The best practice for a tough Facebook Conversions API setup is to use BOTH.
You want the Pixel and the API working together.
- The Pixel is great for “Event Match Quality” (matching the user to their Facebook profile).
- The API is great for “Data Reliability” (catching the sales the Pixel misses).
When you run them together, you get the maximum amount of data. This is called a “Redundant Setup.” (Don’t worry, we will talk about how to prevent them from counting the same sale twice in the “Deduplication” section.)
Why a Facebook Conversions API Setup is Non-Negotiable in 2026
If you are still on the fence about investing time in your Facebook Conversions API setup, let me give you three reasons why you can’t wait any longer.
1. Lower CPA (Cost Per Acquisition)
Facebook’s algorithm needs data to learn. The more data you feed it, the smarter it gets. By recovering the lost 15-20% of data, the algorithm can find more customers like your buyers, lowering your overall costs. (Once your tracking is fixed, you can focus on scaling your High Converting Ad Creatives.
2. Custom Audiences That Actually Work
Retargeting relies on knowing who visited your site. If the browser blocks the Pixel, your retargeting audience shrinks. A properly configured Facebook Conversions APIfills those buckets back up, so you can retarget more people.
3. Future-Proofing
Third-party cookies are dying. Google Chrome is phasing them out. Privacy laws are getting stricter. Browser-based tracking is on its deathbed. A server-side Facebook Conversions API setup is the only way to ensure your business survives the “Cookie Apocalypse.”
Method 1: The “Easy Button” (Shopify/WordPress Partner Integration)
Okay, let’s get into the “How-To.”
If you use a major platform like Shopify, WooCommerce (WordPress), or BigCommerce, your Facebook Conversions API setup is incredibly simple. You don’t need a developer. You just need to click a few buttons.
Here is the step-by-step for Shopify (the process is similar for others):
- Go to Facebook Channel: Log in to your Shopify admin panel and go to the “Facebook & Instagram” sales channel.
- Open Settings: Click on “Settings” and look for the “Data Sharing Settings” section.
- Choose “Maximum”: You will see three options: Standard, Enhanced, or Maximum.
- Standard = Pixel only.
- Enhanced = Advanced Matching.
- Maximum = Facebook Conversions API setup.
- Select Maximum: This automatically turns on the API. Shopify handles the server connection for you.
- Save: That’s it.
For WooCommerce, you will likely use the official “Facebook for WooCommerce” plugin.
- Install the plugin.
- Connect your Ad Account.
- Check the box that says “Enable CAPI” or “Server-Side Tracking.”
This “Partner Integration” method is how 90% of small businesses should handle their Facebook Conversions API setup. It is free, fast, and maintained by the platform.
Method 2: The “Gateway” Route (Meta CAPI Gateway)
What if you aren’t on Shopify? What if you have a custom-built website or use a platform that doesn’t have a direct integration?
You might need the Meta CAPI Gateway.
This is a middle-ground solution. It’s more technical than Shopify but easier than coding it from scratch. The CAPI Gateway uses a cloud server (usually Amazon Web Services – AWS) to catch your Pixel events and transform them into API events.
The Pros:
- It doesn’t require heavy coding on your website.
- It captures data very accurately.
The Cons:
- It costs money (you have to pay for the AWS server hosting).
- The Facebook Conversions API setup here takes about 30-60 minutes and involves DNS settings.
To start this, you would go to your Events Manager in Facebook, go to settings, scroll down to “Conversions API,” and select “Set up with Gateway.” Meta will guide you through connecting to an Amazon AWS account.
Unless you have high traffic volume and a custom site, stick to Method 1. But for mid-sized brands, the Gateway is a solid Facebook Conversions API setup choice.
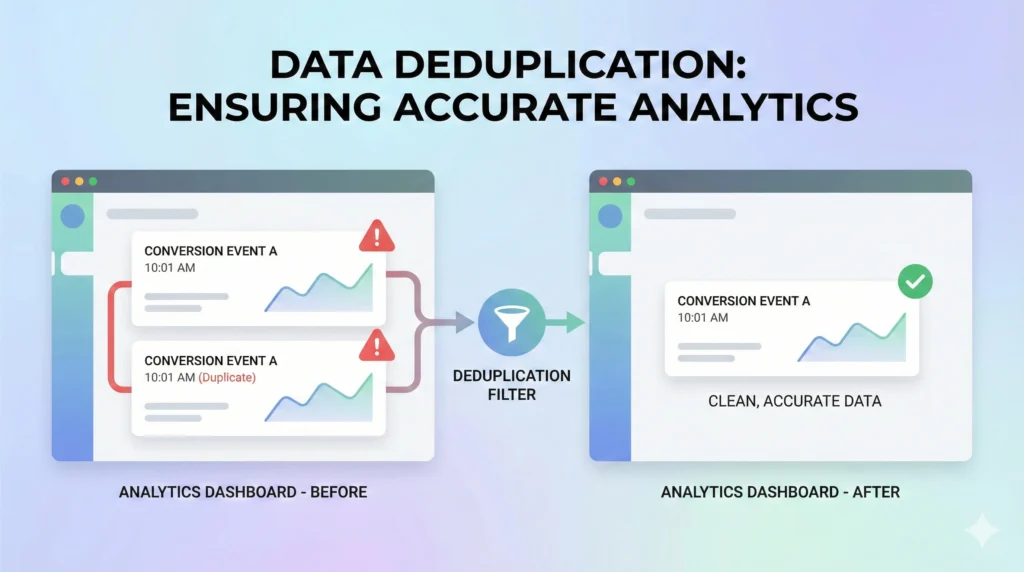
The Deduplication Dilemma (Don’t Double Count!)
Remember when I said you should use both the Pixel and the API?
There is a risk there. If the Pixel sends a “Sale” event, and the API sends a “Sale” event for the same purchase, Facebook might think you made two sales.
This would ruin your data. Your ROAS (Return on Ad Spend) would look double what it actually is.
To fix this, a correct Facebook Conversions API setup requires Deduplication.
How it works: You assign a unique “Event ID” to every action on your site.
- The Pixel sends: “Purchase $50, Event ID: ABC-123”
- The API sends: “Purchase $50, Event ID: ABC-123”
When Facebook receives both, it looks at the IDs. It says, “Wait, these both have ID ABC-123. They are the same event.” It keeps the one that arrived first (or has more data) and discards the duplicate.
If you use Shopify or WooCommerce (Method 1), the platform handles the Event IDs automatically. You don’t need to touch anything.
If you are using a custom setup or Google Tag Manager for your Facebook Conversions API setup, you must ensure your developer is generating a unique Event ID and sending it to both the Browser and the Server. If you miss this step, your reporting will be a mess.
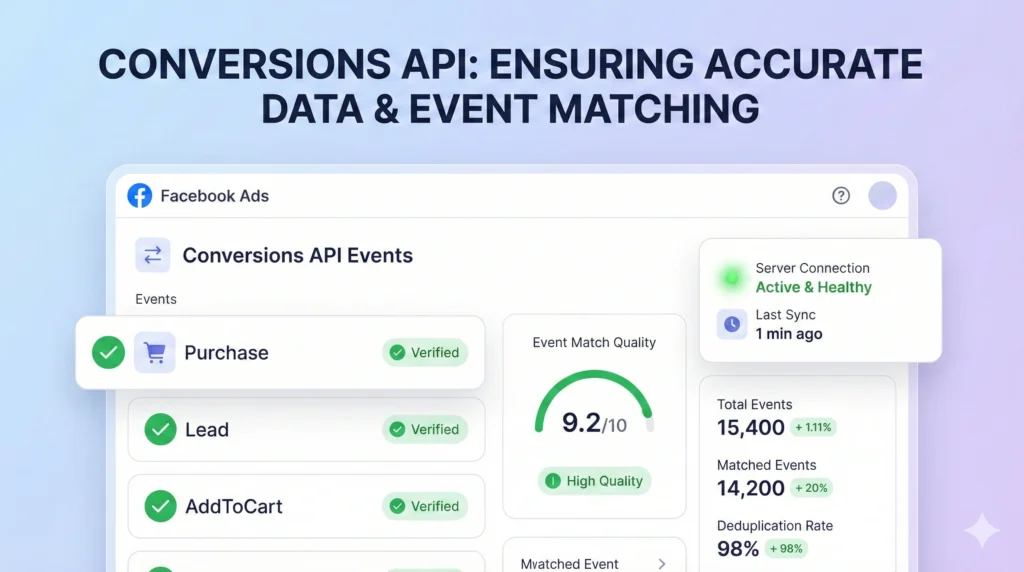
Checking Your Work: How to Verify Your Facebook Conversions API Setup
You’ve clicked the buttons. You’ve enabled “Maximum” data sharing. But does it work?
Never assume your Facebook Conversions API setup is live until you verify it. Here is how to check:
1. The “Test Events” Tool
- Go to Facebook Ads Manager.
- Click the hamburger menu (three lines) and select Events Manager.
- Click on your Data Source (Pixel).
- Click the tab labeled “Test Events”.
- Open your website in a new window and buy something (or just add to cart).
- Go back to the Test Events tab.
You should see the events popping up in real-time.
- Look for the column “Connection Method.”
- You want to see “Server” next to your events.
- Ideally, you will see both “Browser” and “Server” appearing, followed by a status that says “Deduplicated”.
If you see “Server” events popping up, congratulations! Your Facebook Conversions API setup is working.
2. The Diagnostics Tab
In Events Manager, there is a “Diagnostics” tab. Check this weekly. It will warn you if your Facebook Conversions API setup is sending duplicate events, missing parameters, or if the server connection has dropped.
Improving Your “Event Match Quality” Score
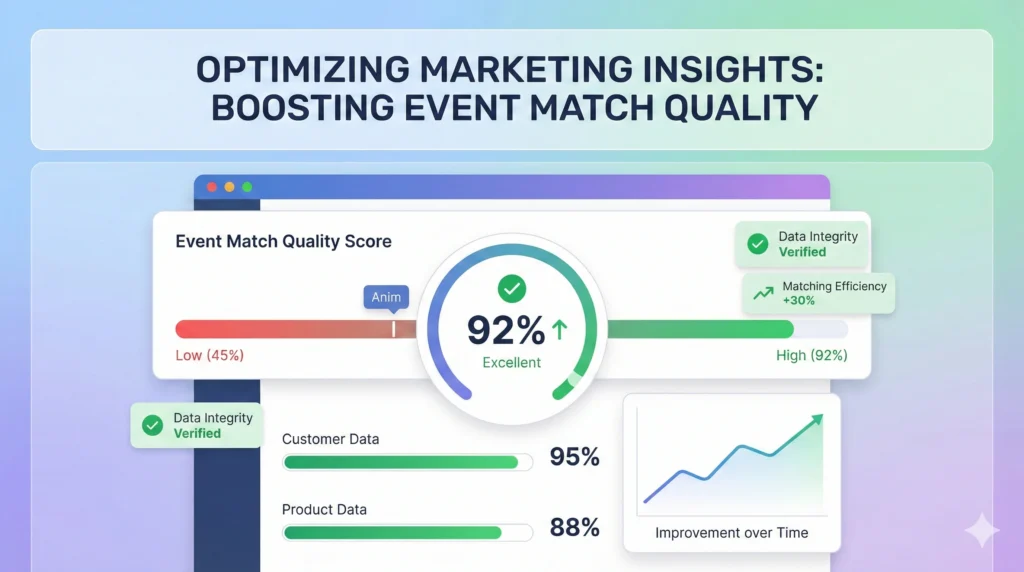
Once your Facebook Conversions API setup is running, you will start seeing a score out of 10 called “Event Match Quality” (EMQ).
This score tells you how good your data is.
- Low Score (3/10): Facebook received the server event, but doesn’t know who the user is.
- High Score (8/10): Facebook received the event and successfully matched it to a specific user profile (e.g., John Smith from Ohio).
A great Facebook Conversions API setup isn’t just about sending the event; it’s about sending user data with the event.
To improve your score, you need to send “Customer Information Parameters” through the API. These include:
- Email Address (Hashed)
- Phone Number (Hashed)
- First Name / Last Name
- City / Zip Code
How to do this: If you are on Shopify (Method 1), ensure you have “Advanced Matching” turned on in your settings. This gives Shopify permission to scrape the customer’s email from the checkout form and send it via the API.
The more identifiers you send, the higher your Match Quality. And the higher your Match Quality, the better your ads perform. This optimization is the difference between a basic Facebook Conversions API setup and a pro-level one.
Common Pitfalls in Facebook Conversions API Setup
Even smart marketers get this wrong. Here are the traps to avoid:
- Ignoring the “Freshness” of Data: The API needs to send data in real-time. If your server sends data 4 hours late, it’s useless for ad optimization. Ensure your Facebook Conversions API setup is real-time.
- Not Hashing Data: You cannot send raw emails (like “john@gmail.com”) to Facebook. It violates privacy laws. The data must be “hashed” (turned into a code string). Partner integrations handle this automatically, but custom setups often forget it.
- Disabling the Pixel: I will say it again: Do not turn off your Pixel! A robust Facebook Conversions API setup is an addition to the Pixel, not a replacement.
Conclusion: Data is Power
We live in a world where data is the new oil. The businesses with the best data win.
By completing your Facebook Conversions API setup, you aren’t just “fixing a technical issue.” You are giving your business a competitive advantage.
While your competitors are complaining about how “Facebook Ads don’t work anymore” because their browser-tracking is broken, you will be feeding the algorithm high-quality, server-side data. You will see sales they miss. You will retarget customers they lose.
So, don’t put this off. Whether you use the Shopify “Easy Button” or the Gateway method, get your Facebook Conversions API setup done today.
It’s the single highest-ROI activity you can do for your ad account this year.
Go fix your tracking, and watch those ROAS numbers climb back up where they belong.